


Add an MCP server to Claude Code and Codex
Giving a terminal agent the right tools means wiring it to MCP servers. The procedure to add an MCP to Claude and Codex is surprisingly similar: both have a dedicated command and a configuration file. In this guide I walk it twice with the same example — the Playwright server — first on Claude Code (the /mcp command and ~/.claude.json), then on Codex (~/.codex/config.toml), with annotated screenshots pointing at every section.
🔍 What an MCP server is and how you add one
The Model Context Protocol (MCP) is the open standard that connects an AI assistant to external tools: an MCP server exposes tools, resources and prompts the agent can call — browse a page, read a database, hit an API. Adding one to Claude or Codex gives the agent real new capabilities.
The good news is that the mechanism is almost identical across the two: there is always a command to manage servers and a file where they are listed. To show it I use a single example, the Playwright server that drives a browser, so you see the same operation first on Claude and then on Codex.
# One package, the same for Claude and for Codex
npx @playwright/mcp@latest
Official docs · Playwright MCP ↗
⌨️ Claude Code: the /mcp command
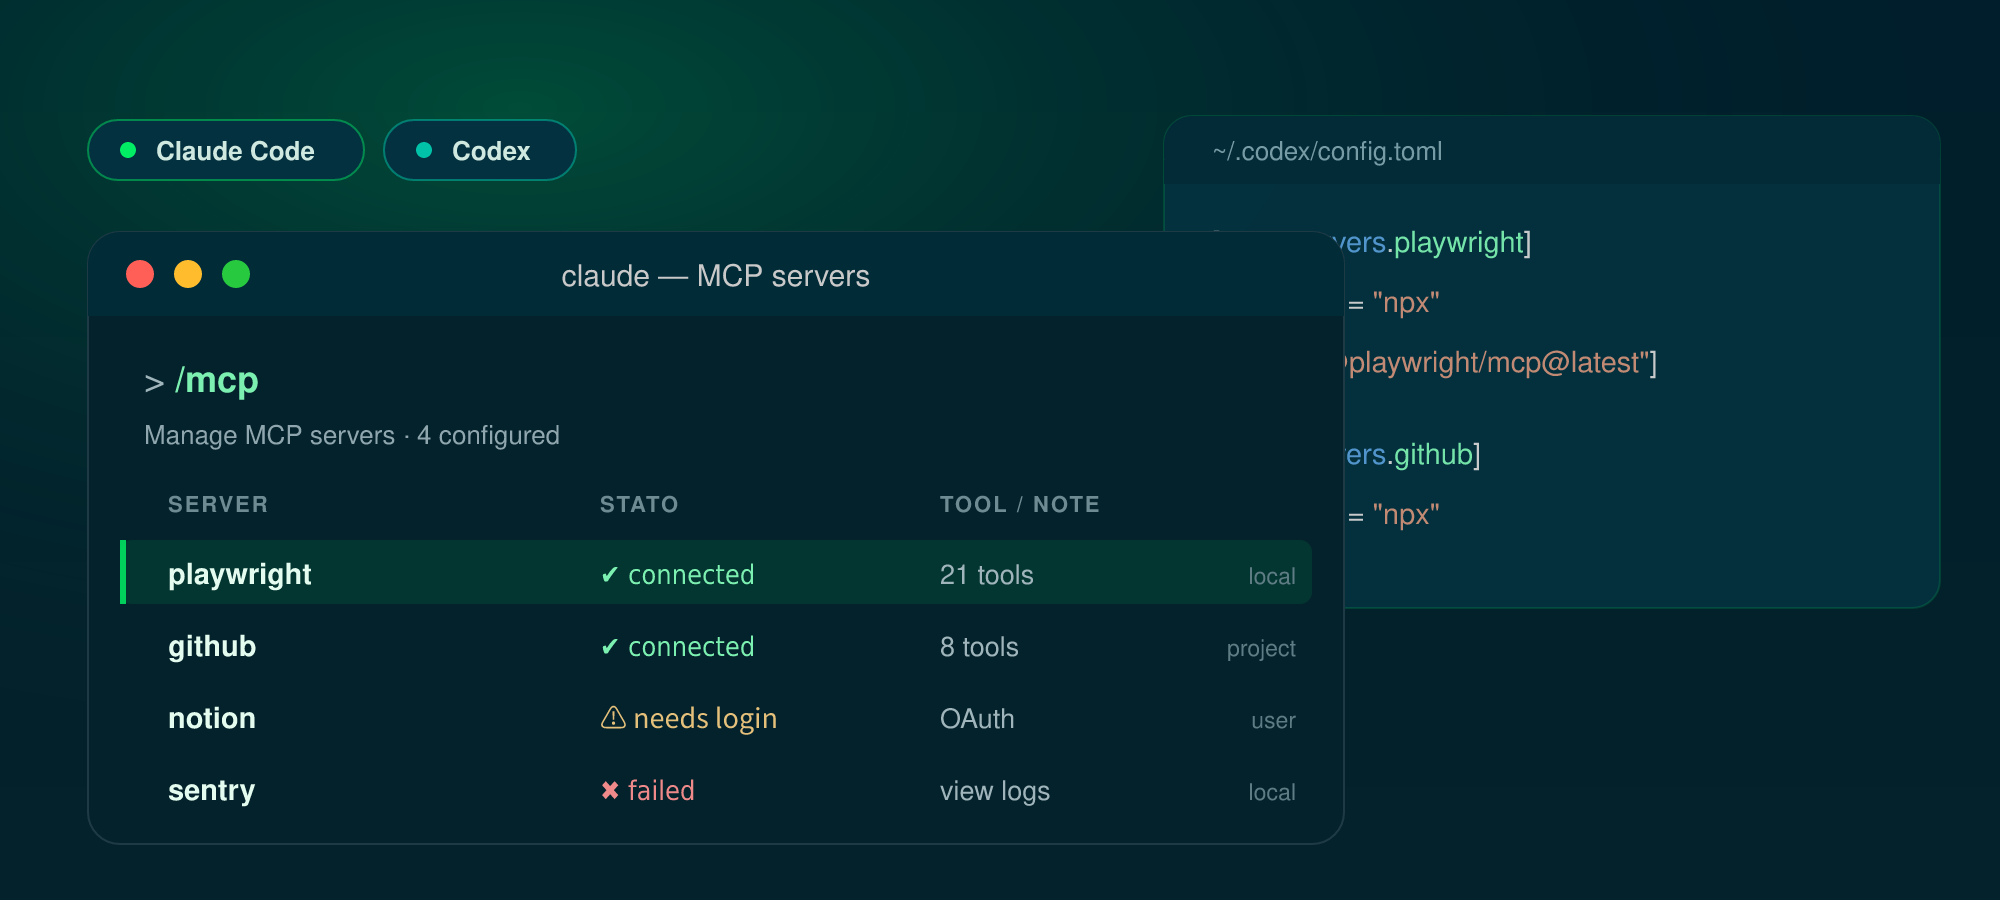
Let's start with Claude Code. Inside a session, the /mcp command opens an interactive panel: it lists the configured servers, shows the connection status, how many tools each one exposes, and lets you authenticate the ones gated by OAuth.
It is the first place to look when a server won't respond: if you read needs login or failed next to the name, the problem is there, not in your prompt. From the panel you restart, disconnect or authenticate a server without opening any file.
Status per server, tool count and scope; ↵ on an OAuth server starts the login.
🛠️ Claude Code: list, add and remove from the terminal
Outside the session, management goes through the claude mcp subcommand. The three you'll always use: list to see what's configured, add to add a server, remove to drop it; with get you inspect a single server.
The flag that matters is --scope (or -s): local is just for you in this project, project lands in a versionable file shared with the team, user applies across all your projects. Pick the scope before you add, not after.
- list — lists the servers and their status.
- add — adds a server (stdio or http).
- remove — removes a server from the chosen scope.
# List, inspect, remove
claude mcp list
claude mcp get playwright
claude mcp remove playwright

# Add a stdio server: everything after -- is the command to launch
claude mcp add playwright -- npx @playwright/mcp@latest

# ...with an explicit scope and an environment variable
claude mcp add -s project -e API_KEY=*** github -- npx -y github-mcp-server
Official docs · MCP in Claude Code ↗
⚙️ Claude Code: the configuration file
Every server you add lands in a JSON file. At the user level it is ~/.claude.json; at the project level it is .mcp.json in the repo root — the one you share with the team. There is a single key, mcpServers, with one entry per server.
A stdio entry has command and args (how to launch the process); an http entry has type and url for a remote server. Tokens are never written in plain text: pass them through environment variables, as in the annotated example below.
Playwright over stdio, GitHub over http: the arrows point at the parts explained in the text.
🧱 Claude Code: add Playwright step by step
Let's put it together. To add Playwright to Claude one line is enough: the server name, then --, then the command that launches it. Claude registers it, starts it and discovers its tools on the fly.
Verify right away with claude mcp list — playwright must show up — or open /mcp in session. If instead you read spawn npx ENOENT Node or npx is not on the PATH: it's the most common error, and it isn't an MCP problem.
claude mcp add playwright -- npx @playwright/mcp@latest
claude mcp list
#  playwright   ✔ connected · 21 tools
Official docs · Playwright MCP ↗
🔌 Codex: add an MCP from the terminal
On to Codex, OpenAI's CLI. The logic is the same as Claude's, the details change. The subcommand is codex mcp: add to add, list to list, remove to remove; here too -- separates the server name from the command to run.
The Playwright example is almost identical to Claude's: same package, same npx, only the wrapping command changes. Environment variables are passed with --env (or -e).
- codex mcp add — adds a server.
- codex mcp list — lists the servers (--json for scripting).
- codex mcp remove — removes a server.
# Add Playwright to Codex
codex mcp add playwright -- npx @playwright/mcp@latest

# List and remove
codex mcp list
codex mcp remove playwright

# ...with an environment variable
codex mcp add -e API_KEY=*** github -- npx -y github-mcp-server
Official docs · MCP in Codex ↗
📄 Codex: the config.toml file
Codex doesn't use JSON but TOML. The configuration lives in ~/.codex/config.toml and each server is a dedicated table, [mcp_servers.name]: the server name is the part after the dot.
Inside the table you put command and args for a stdio server, and env for environment variables. It is the exact equivalent of Claude's mcpServers block, written in TOML instead of JSON.
[mcp_servers.playwright] is the equivalent of Claude's JSON entry.
⚖️ Claude and Codex side by side
Both paths reach the same result. It's worth keeping the practical differences in mind when you switch between them: what changes most is where the configuration lands and with what syntax you write it.
Claude Code
- In-session panel: /mcp
- CLI: claude mcp add / list / remove
- JSON config: ~/.claude.json and .mcp.json
- mcpServers key · scopes local/project/user
- Variables: -e flag or env block
Codex
- CLI management: codex mcp add / list / remove
- TOML config: ~/.codex/config.toml
- [mcp_servers.name] tables
- Variables: --env flag or env key
- Same Playwright package via npx
Same mechanism, different syntax: JSON for Claude, TOML for Codex.
✅ Apply and verify
The loop is always the same, on both: add the server, check it shows as connected, use it in chat and, if something won't start, read the status and the logs before touching the configuration.
One last habit: version the configuration with no secrets. On Claude you share .mcp.json, on Codex config.toml, but tokens stay in environment variables, never inside the file.
- 01Add the serverclaude mcp add … or codex mcp add …
- 02Verify the status/mcp and claude mcp list · codex mcp list
- 03Use the tools in chatThe agent asks for confirmation before acting.
- 04Debug from the logsspawn npx ENOENT? Node/npx not on the PATH.
Frequently asked questions about add MCP to Claude and Codex
What's the difference between the /mcp command and claude mcp?
/mcp is interactive and used inside a Claude Code session to see server status and authenticate them; claude mcp is the terminal subcommand you automate add, list and remove with. They are complementary.
Where are Claude's and Codex's MCP servers stored?
Claude uses JSON: ~/.claude.json (user) and .mcp.json (project, versionable). Codex uses TOML: ~/.codex/config.toml, with one [mcp_servers.name] table per server.
Which is the right package for the Playwright server?
The official one is @playwright/mcp, launched with npx @playwright/mcp@latest. Avoid the unofficial packages with similar names: the same command works for Claude and for Codex.
How do I pass a token to an MCP server without writing it in the file?
With environment variables: on Claude the -e NAME=value flag (or the env block in JSON), on Codex --env NAME=value (or the env key in TOML). That way the configuration file stays shareable.
Let's talk
If this topic is relevant to you, write to me: comparing notes on code and AI is always time well spent.